Blue velvet cake. Cake is always a favorite part of any shower and I wanted it to have a surprise inside when you cut it. A new twist on a traditional red velvet cake, inspired by the royal heirloom sapphire engagement ring. Rating Fold in coconut and nuts.
 Sometimes referred to as a Blue Suede Cake, you'll love that this beautiful blue velvet color comes from all. Blue velvet cake is a delicious twist on the more traditional red velvet cake. It is typically served with a cream cheese-based icing, but you can also make it with a basic, marshmallow icing instead. You can cook Blue velvet cake using 18 ingredients and 13 steps. Here is how you achieve that.
Ingredients of Blue velvet cake
- You need of Per la base:.
- It's 80 g of burro.
- You need 225 g of zucchero.
- You need 2 of uova.
- You need 4 g of cacao.
- Prepare 1 bustina of vanillina o aroma di vaniglia.
- You need of Colorante alimentare blu.
- It's 175 g of yogurt bianco.
- It's 3 g of sale.
- Prepare 225 g of farina.
- Prepare 4 g of aceto di mele.
- Prepare 4 g of bicarbonato.
- You need of Per la farcitura:.
- It's 600 ml of latte.
- Prepare 60 g of amido di mais.
- Prepare 250 ml of panna da montare.
- It's of Cioccolato a scaglie.
- It's of Smarties.
Rebecca Brand shows how to make Blue Velvet cake, related by blue blood ties to Red Velvet Cake, an elegant beautiful holiday cake, perfect for Hannukah, Christmas, or Dinner Parties. The cake is extremely moist but does not fall apart. White velvet cake gets it's flavor and velvety texture from buttermilk. My family loves my velvet cake and they are so delicious and moist.
Blue velvet cake step by step
- Lavorare con delle fruste elettriche il burro ammorbidito a temperatura ambiente con lo zucchero fino ad ottenere una crema omogenea..
- Aggiungere le uova uno alla volta mescolando a mano fino a completo assorbimento..
- In una ciotolina mescolare il cacao e la vaniglia (estratto o in polvere) e aggiungerli al composto mescolando..
- Aggiungere il colore in base alla tonalità desiderata..
- Aggiungere il sale allo yogurt, mescolare e aggiungere poi poco alla volta al composto di uova, alternando yogurt e farina e mescolare ad ogni aggiunta..
- Per ultimo pesare il bicarbonato, aggiungere l'aceto (si svilupperà l'effervescenza), aggiungerlo al composto e mescolare..
- Versare l'impasto in una teglia imburrata e infarinata di diametro 22cm e cuocere a 180° forno statico per 40 minuti (fare la prova dello stuzzicadenti, potrebbe essere necessario più tempo per una cottura ottimale)..
- Preparare la farcitura mescolando a fuoco lento il latte e l'amido di mais fino a che addensa. Coprire con pellicola e far raffreddare..
- Montare la panna, aggiungere poco alla volta il composto a base di latte raffreddato, aggiustare con lo zucchero a velo (io la assaggio)..
- Tagliare in due dischi la base, essendo molto umida non faccio la bagna, ma volendo se ne può fare una leggera con acqua aromatizzata alla vaniglia. Farcire con la crema a ciuffetti, qualche scaglia di cioccolato fondente e proseguire con lo strato superiore..
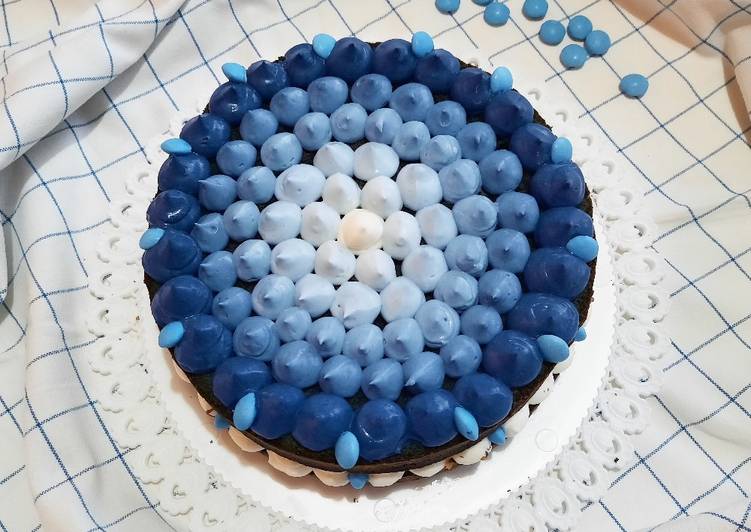
- Aggiungere poco alla volta il colorante fino ad arrivare alla tonalità del blu e farcire partendo dal centro verso l'esterno. Aggiungere degli smarties celesti!.
- CONSIGLIO: usare colorante gel perché quello liquido si ossida molto velocemente! Non preoccupatevi se il primo tentativo è poco blu!.
- ATTENZIONE: se volete evitare l'ossidazione del colorante aggiungetelo alla fine, prima del mix aceto/bicarbonato!.
I can make red, blue, orange, purple and white velvet cake for holidays. Combine the blue velvet cake ingredients in a mixing bowl. Pour cake batter into your rice cooker bowl. In a mixing bowl, cream the sugar and butter, mix until light and fluffy. Red velvet cake is my favorite cake of all cakes, so I decided to try to make a blue velvet cake instead and see how it turned out.

Nessun commento:
Posta un commento
Nota. Solo i membri di questo blog possono postare un commento.